A beautiful carpet can tie a room together, but daily life can take its toll. Spills, accidents, and general wear and tear can lead to unsightly damage, leaving you to wonder if you need to spend a fortune on professional repairs or even a full replacement. The good news is that many common carpet problems can be fixed with a little DIY know-how, and you could save yourself up to $250 or more in professional fees.
As Sydney’s cleaning experts, we’ve seen it all when it comes to carpet mishaps. We also know that with the right tools and techniques, you can tackle many of these issues yourself. In this guide, we’ll walk you through the top three DIY carpet repairs that will have your floors looking fresh and flawless in no time.
The Power of DIY Carpet Repairs
Opting for DIY carpet repairs isn’t just about saving money; it’s also about the convenience and satisfaction of a job well done. Professional carpet repair services can be costly, with minimum call-out fees and charges for even the smallest of jobs. By learning a few simple repair techniques, you can address problems as they arise, preventing minor issues from becoming major headaches.
From patching a burn hole to removing a stubborn stain, these DIY carpet repairs are surprisingly effective and can extend the life of your carpet, saving you from the much higher cost of a complete replacement.
DIY Carpet Repairs: #1 The Invisible Patch for Burns and Holes
One of the most intimidating-looking carpet problems is a burn mark or a small hole. Whether from a stray ember from the fireplace or a dropped curling iron, these blemishes can be a real eyesore. But with a simple patching technique, you can make them disappear. This method works best on plush, tufted carpets without intricate patterns.
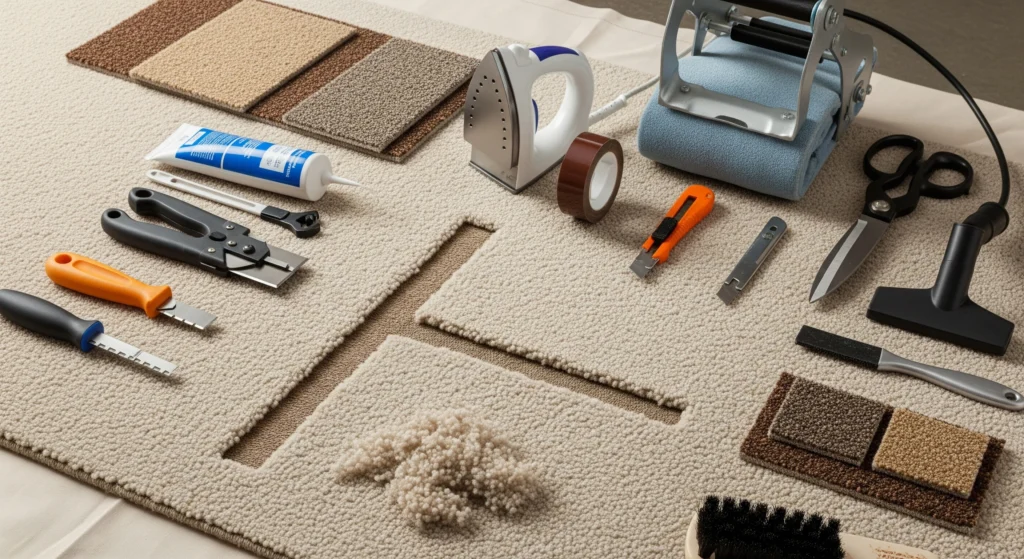
Tools and Materials You'll Need:
- Carpet patch kit (or a utility knife and carpet adhesive)
- A scrap piece of matching carpet (from the original installation, a closet, or under a large piece of furniture)
- Carpet seam roller (or an old comb)
- Vacuum cleaner
Step-by-Step Guide to a Flawless Carpet Patch:
Prepare the Damaged Area: Before you begin, thoroughly vacuum the area to remove any loose debris. If it’s a burn mark, carefully trim away the charred fibers with scissors.
Cut Out the Damaged Section: Using a carpet cutter from a kit or a sharp utility knife, carefully cut out the damaged section of the carpet. Be mindful not to cut through the carpet padding underneath. If you’re using a utility knife, it’s helpful to use a round object as a guide to create a clean, circular cut.
Create Your Patch: Using the piece of damaged carpet you just removed as a template, cut a matching patch from your scrap piece of carpet. Make sure the pile of the patch runs in the same direction as the surrounding carpet for a seamless blend.
Apply the Adhesive: There are several options for adhesives, including specialized carpet glue or adhesive disks that often come in patch kits. Apply the adhesive to the subfloor or the back of the patch, following the manufacturer’s instructions.
Set the Patch: Carefully place the patch into the hole, ensuring a snug fit. Press down firmly to secure it in place.
Blend the Seams: Use a seam roller or the teeth of an old comb to blend the fibers of the patch with the surrounding carpet. This is a crucial step for making the repair invisible. Ruffle the fibers to hide the seam.
Let it Cure: Allow the adhesive to dry completely according to the product’s instructions. Avoid walking on the patch until it’s fully cured.
DIY Carpet Repairs: #2 Tackling Tough Stains Like a Pro
Stains are an inevitable part of life with carpets, but they don’t have to be permanent. With the right approach and a few household staples, you can conquer even the most stubborn stains. The key is to act quickly and use the right cleaning solution for the specific type of stain.
Essential Stain-Fighting Tools:
- Clean white cloths or paper towels
- Spray bottle
- Mild dish soap
- White vinegar
- Baking soda
- Rubbing alcohol
Your DIY Stain Removal Playbook:
- For Food and Drink Spills: The first rule of thumb is to blot, not rub! Gently blot the spill with a clean, dry cloth to absorb as much of the liquid as possible. Then, mix a solution of one teaspoon of mild dish soap with two cups of warm water. Lightly spray the solution onto the stain and continue to blot until the stain is gone. Rinse by spraying with clean water and blotting again.
- For Pet Accidents: Pet urine can be a particularly tough stain to remove due to the odor-causing uric acid. After blotting up as much of the urine as possible, spray the area with a solution of equal parts white vinegar and water. The vinegar will help to neutralize the ammonia in the urine. Let it sit for a few minutes, then blot dry. For lingering odors, sprinkle baking soda over the area, let it sit for a few hours, and then vacuum it up.
- For Greasy or Oily Stains: For greasy stains, baking soda is your best friend. Sprinkle a generous amount of baking soda over the stain and let it sit for several hours to absorb the grease. Then, vacuum it up. If the stain persists, you can use a small amount of rubbing alcohol on a clean cloth to gently dab at the stain.
- For Coffee or Red Wine Stains: These dark stains can be intimidating, but a salt-based solution can work wonders. After blotting the spill, liberally cover the stain with salt. The salt will help to draw the liquid out of the carpet fibers. Let it sit for a few hours, or until the salt has absorbed the color of the stain, and then vacuum it up thoroughly.
DIY Carpet Repairs: #3 Mending Minor Tears and Rips with Ease
Small tears and rips in your carpet can be caused by moving furniture or even a pet’s claws. If left unaddressed, these small tears can grow larger over time. Fortunately, fixing a minor tear is a simple DIY carpet repair.
What You'll Need:
- Carpet seam tape or double-sided carpet tape
- Utility knife
- Hot glue gun (for a more permanent fix)
A Simple Guide to Mending Carpet Tears:
Clean the Area: Start by vacuuming the area around the tear to remove any dirt or debris.
Trim any Frayed Edges: Use a utility knife or sharp scissors to carefully trim any frayed or loose fibers along the edges of the tear. This will create a cleaner seam for your repair.
Apply the Adhesive:
For Carpet Tape: Cut a piece of carpet seam tape that is slightly longer than the tear. Slide the tape under the tear, with the adhesive side facing up. Press the edges of the tear firmly onto the tape.
- For a Hot Glue Gun: Carefully apply a thin bead of hot glue to the subfloor along the length of the tear. Press the edges of the carpet into the glue, holding them in place until the glue sets. Be careful not to use too much glue, as it can seep through the carpet fibers.
- Blend the Seam: Just as with patching, use a seam roller or a comb to blend the carpet fibers along the seam, making the repair less noticeable.
Know Your Limits: When to Call in the Experts
While these DIY carpet repairs are effective for many common issues, it’s important to recognize when a problem is beyond the scope of DIY fixes. You should consider calling a professional carpet repair service in the following situations:
- Large or extensive damage: If you have a very large tear, extensive water damage, or multiple damaged areas, a professional will have the specialized tools and expertise for the job.
- Damage to the subfloor: If a spill or pet accident has soaked through to the subfloor, you may need professional help to address potential mold or mildew growth.
- Patterned carpets: Matching patterns in a patch can be tricky. A professional can ensure a seamless repair on patterned carpets.
- Carpet stretching: If your carpet is buckling or wrinkling, it may need to be stretched. This is a job best left to the professionals who have the proper power-stretching equipment.
The Final Word on DIY Carpet Repairs
With a little time and the right techniques, you can tackle many common carpet repairs yourself, saving money and extending the life of your flooring. From patching small holes to removing stubborn stains, these DIY carpet repairs are a cost-effective way to keep your carpets looking their best. So next time you’re faced with a minor carpet catastrophe, don’t despair. Roll up your sleeves, follow these tips, and enjoy the satisfaction of a job well done.